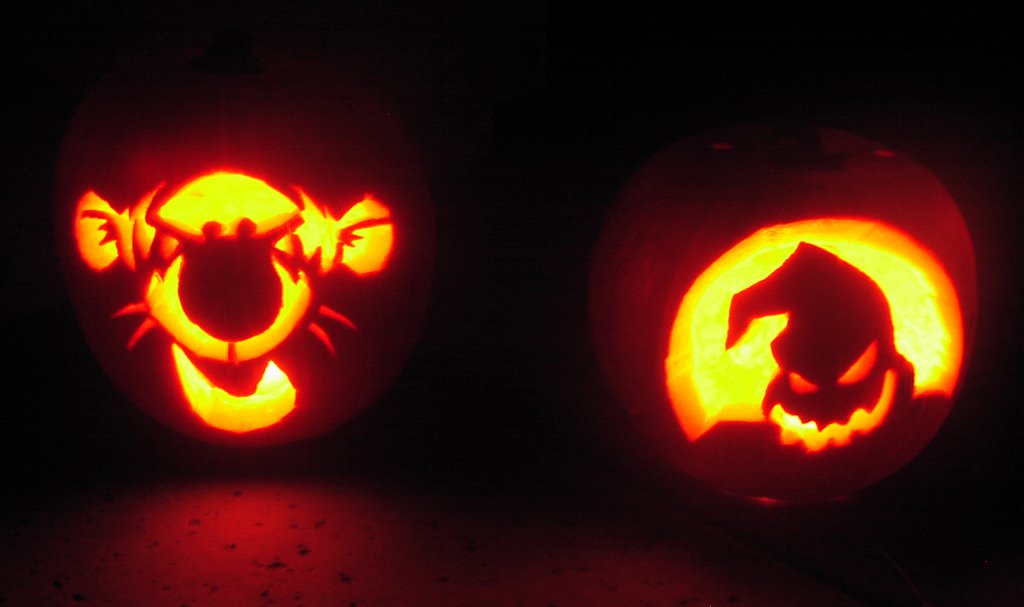
 So today is the day! I love Halloween. I think it is such a fun holiday. I carved my two pumpkins, and just need to get the kids ready and then it will be trick or treat time. Here are my pumpkins I made today. I made Tigger for the kids, and I made Oogie Boogie from Nightmare Before Christmas because I have a weird obsession with Oogie. I just like him for some reason. He is fun! I had wanted to stamp, but I am just not seeing the time for that to happen. I still have to pack half my office in time for people to come mess with my closet in the morning. So far I have had about 20 or so trick or treaters, but I bet a rush will come soon, so I need to go get more prepared for that . . . have a fun and safe night!!
Tuesday, October 31, 2006
HAPPY HALLOWEEN
So today is the day! I love Halloween. I think it is such a fun holiday. I carved my two pumpkins, and just need to get the kids ready and then it will be trick or treat time. Here are my pumpkins I made today. I made Tigger for the kids, and I made Oogie Boogie from Nightmare Before Christmas because I have a weird obsession with Oogie. I just like him for some reason. He is fun! I had wanted to stamp, but I am just not seeing the time for that to happen. I still have to pack half my office in time for people to come mess with my closet in the morning. So far I have had about 20 or so trick or treaters, but I bet a rush will come soon, so I need to go get more prepared for that . . . have a fun and safe night!!Monday, October 30, 2006
GREAT NEWS
 Today has been a pretty good day. I have not really done anything exciting, but I do have some great news.
1) We are finally getting a puppy. He is a lhasa-poo and is coming from Missouri, and he will fly in 3-5 days from now. He is so cute. I am super excited. He is only 6 weeks old and this is a picture of his adorable little self. I love his reddish color. What can I say, I am a sucker for redheads. We are going to name him "Dobby" - our little house elf. We are HP nerds!
2) I am teaching a class on how to make Christmas Balls in Dec. (I will post a picture of them later this week - I learned how to make them last year from texasjodylynn).
3) Hobby Lobby is opening close to me (the first one in AZ) on Nov 6th
4) We are at 62 subscribers to this blog and will reach post 100 soon, so there will be a celebration in the near future, which will include me shopping for prizes *YAY* The main drawing will come from the first 100 subscribers to my blog. There will be one sweet prize pack for them, and then a second prize will be awarded to a random comment poster on post #100, so stick around cause this action is coming SOON!!!
Okay, so maybe not all that exciting for all of you, but super duper cool to me *smiles*
Sunday, October 29, 2006
DO you miss me yet?
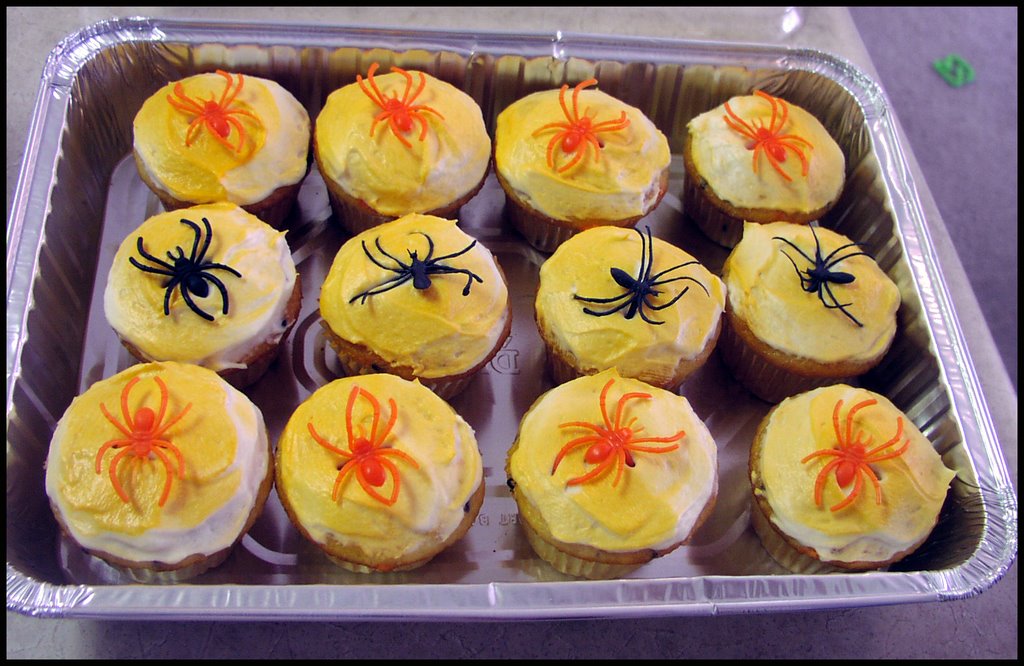 Okay, so sorry I have been MIA. I have been so busy. Yesterday I got three teeth filled and then had to take my kids to a Halloween Party at our church. In the morning I worked on treats for it, and cupcakes. The cupcakes were Halloween funfetti, and then frosted with butter frosting and then sprayed with the Wilton color spray. Then I pressed a spider ring into each one. I think they turned out awesome. Some of them looked like they had dead spiders on them.
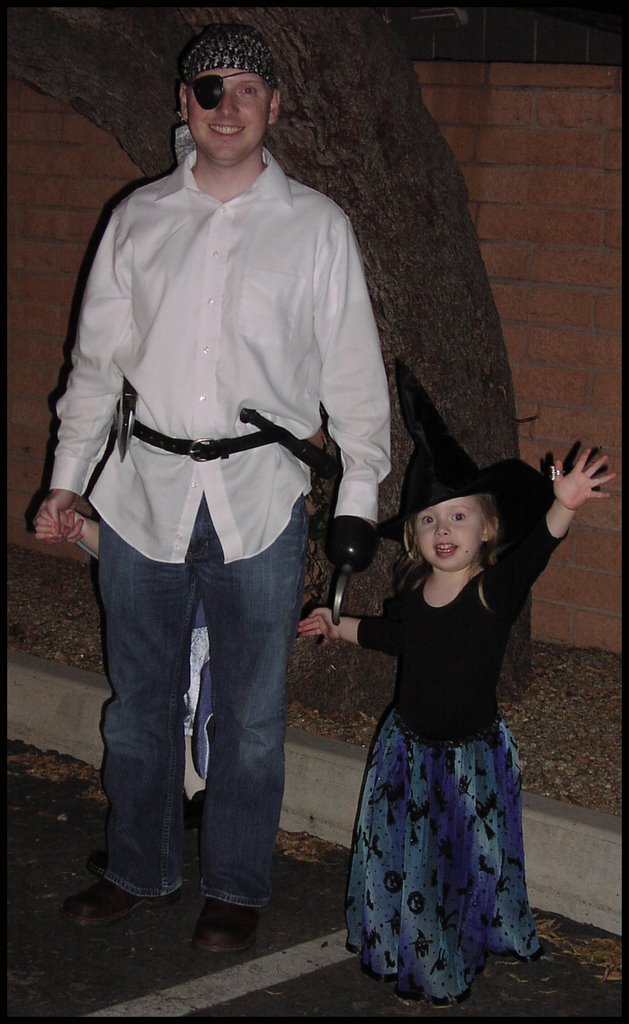
M dressed up as a pirate, as per E's request. J was a shark. They looked just so darn cute. E was my little witch. She was so excited. I made her costume. I am completely sewing challenged, so this was a big deal to me. I just used a body suit on top, but the skirt was what I made. It turned out fabulous!!!!
There was lots to do at the party. They had an area to eat, and these huge sub sandwiches. They had a play area, with all sorts of games: A bean bag toss, a balloon popping one, a fishing one, a donut eating one, and one called the cake walk, which is
 where every kid walks around in a circle on this little squares and when STOP is yelled (or music turned off) they all stop and a color is called and if you are on that color you get to choose a cupcake. It was a really cute idea (that is what the cupcakes above were for). Of course, my kids chose to eat the brightest orange and messiest ones *sigh* Oh, and there was even a hayride complete with spooky scenes set up for you to hayride past. E insisted we go on that one, and she had a lot of fun with it.
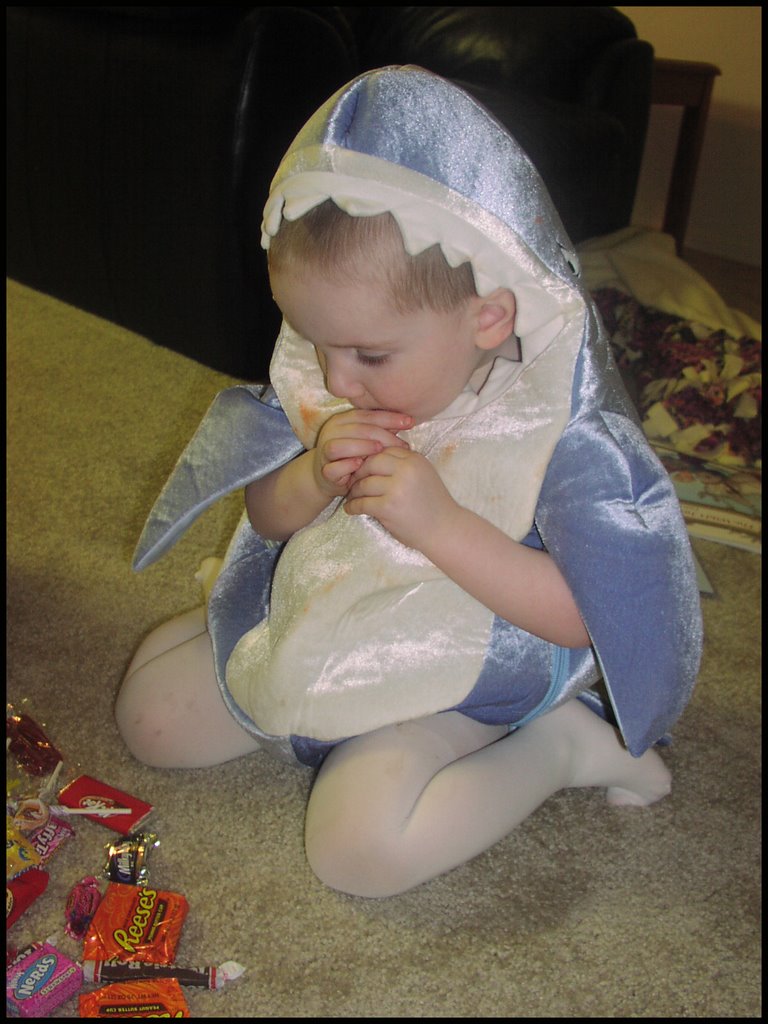 After that, all the kids went "trunk or treating" which is where we adults all have our cars lined up and the kids trick or treat at each car. M and I decided to give out full size candy bars, which was so exciting to a lot of kids. It was great! I enjoyed watching everyone's costumes and M took E around. J stayed with me and drank some water. He was sugared out and tired out.
We went home and the kids enjoyed choosing out some candy to eat before bed. They both were super excited. I got M to take a picture of me with them, because somehow I never make any of the pictures -- and afterall, I was wearing my cat ears. After a good teeth brushing, we tucked the kids into bed to go to sleep.
Here is the one of me and kids:

Wednesday, October 25, 2006
SC 94 - Really cool way to make a card.
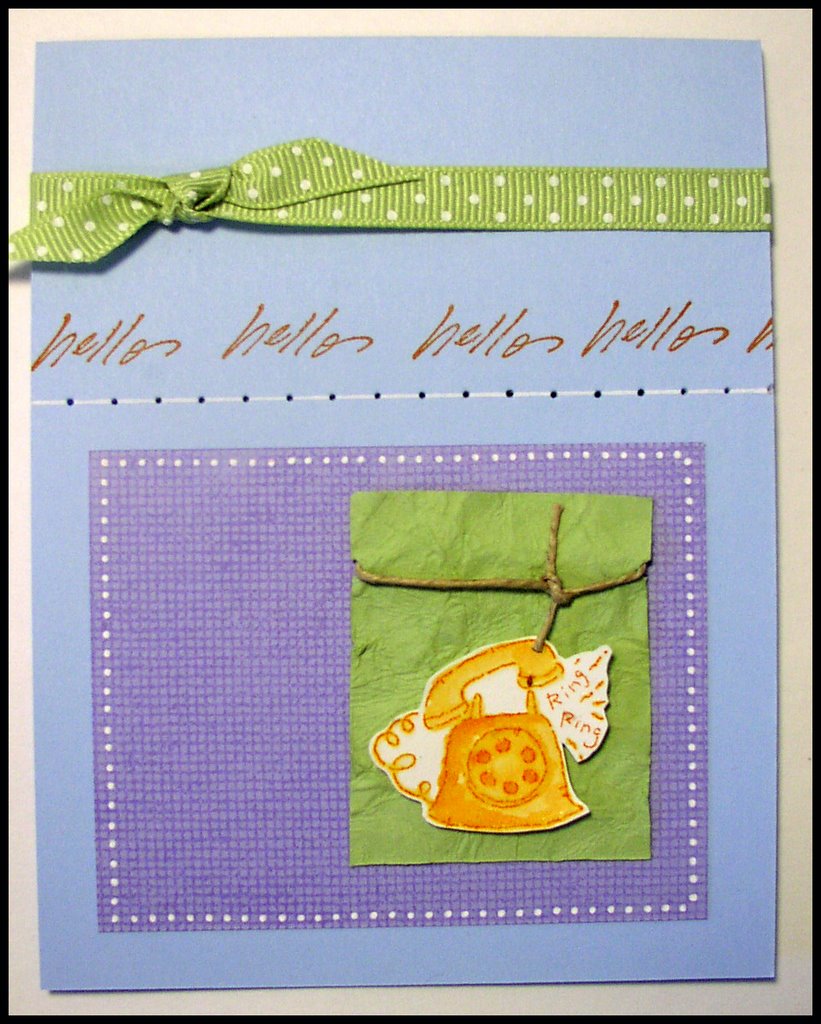
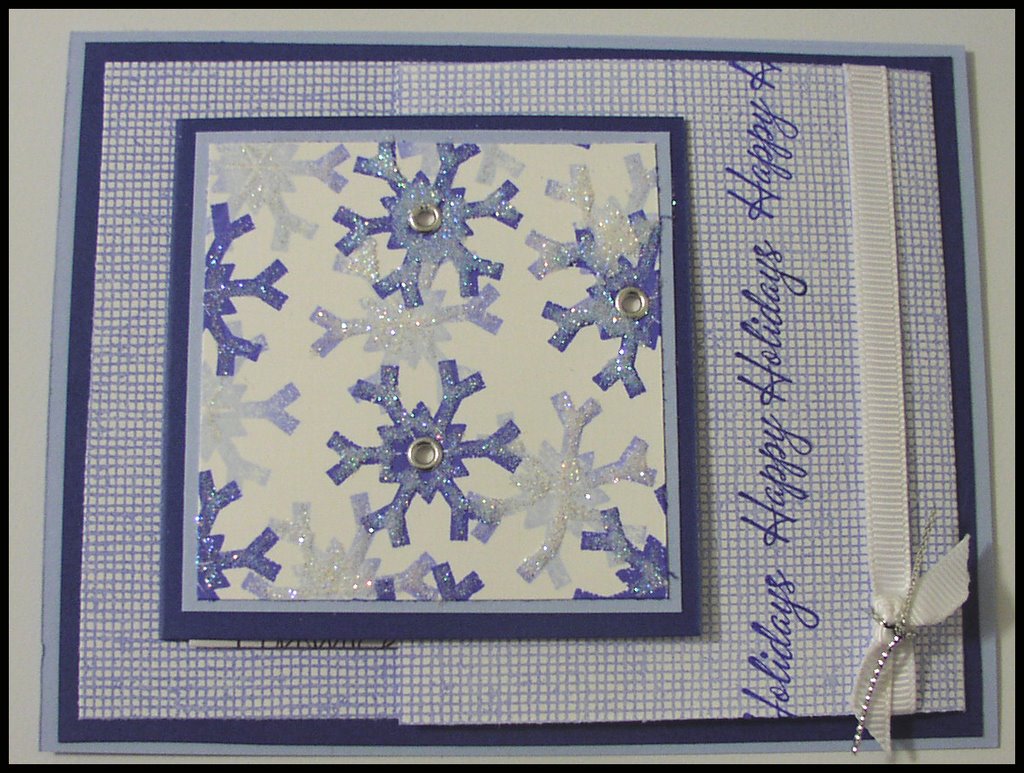 So I had a great mail day yesterday. I got this most adorable card from Teresa and a little mini card, for Hallowe'en, in the same envelope. The card is what I want to focus on here though. She used the layout from SC94 and it just looked so darling, I was inkspired to make one of my own for my DDSS for round 6. I have been a slacker DDSS, so I am trying to do better. I just find it so hard to use only SU supplies for it. Anyway, I digress . . .
This card uses the "Blue Frost" spectrum pad from SU (which in case you were wondering, does not look all that nice when you accidentally drop it face down on your laptop keyboard.) I also used the SU hostess set "Warmest Regards" which I am currently in love with, and "All Through the Year" which is seriously so versatile. Oh, and cannot forget the "Canvas" background stamp. You will definitely have to take a look at the Sketch Challenge page to see how it opens and stuff. I used two way glue pen and dazzling diamonds on the snowflakes and eyelets in the center because ever since I bought the silent setter from ProvoCraft, I have no reason not too -- it is glorious. I really am happy with how this one turned out and I really hope that my DDSS likes it.
Tuesday, October 24, 2006
Holiday Spice Cake in a Jar
 So, for Super Saturday, I made this as a sample. This week I will pretty much show you all sorts of samples I made. This is a quart sized jar gift. The colors are regal rose, tempting turquoise, and certainly celery, which I believe was the color challenge a couple weeks ago - one that I never got to. The recipe came from a little book I got at Walmart, either last year of the year before that -- for $3 -- it is called "Holiday Jar Mixes" by Andra Roberts and Wilma Teal.
 Here is the recipe:
Holiday Spice Cake Mix
In the jar:
2 ½ cups all-purpose flour
1 ¼ tsp baking powder
1 ¼ tsp baking soda
1 ¼ tsp cinnamon
¼ tsp cloves
½ tsp ginger
½ tsp allspice
1 ¼ cups white sugar
½ cup packed brown sugar
In a medium bowl combine all ingredients. Mix. Place in a 1 quart glass jar. Attach a recipe card with the following ingredients and instructions:
ADD INS:½ cup butter, softened
1/3 cup shortening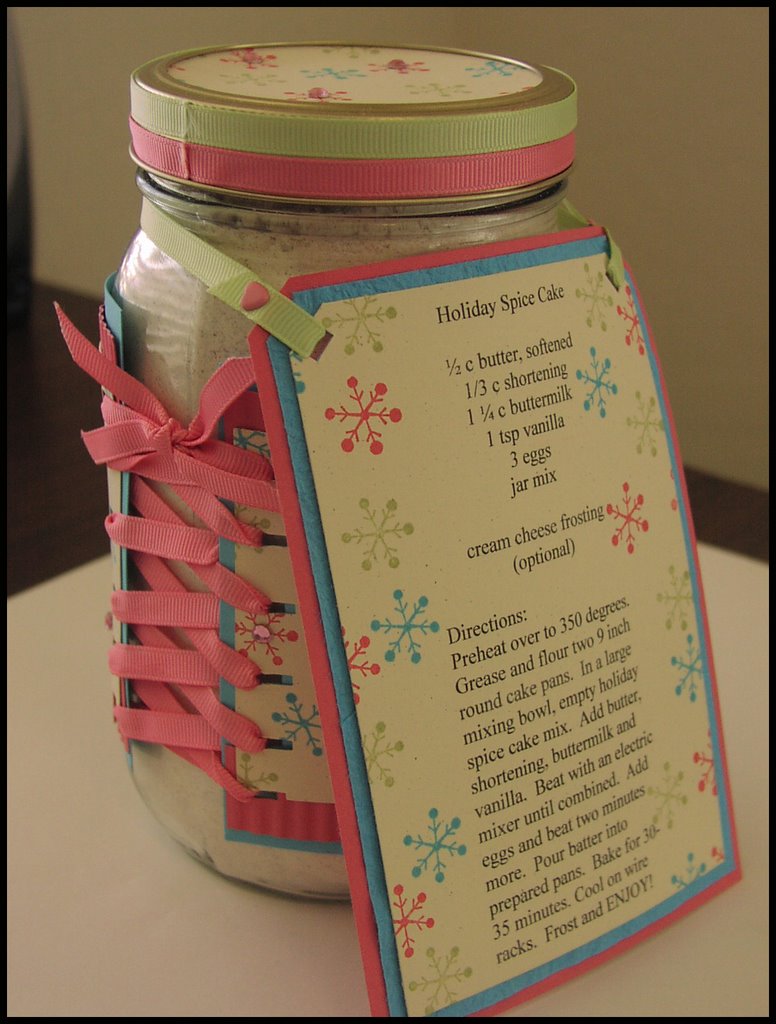
1 ¼ cups buttermilk
1 tsp vanilla
3 eggs
Cream cheese frosting (optional)
Directions: Preheat oven to 350 degrees. Grease and flour two 9 inch round cake pans. In a large mixing bowl, empty Holiday Spice cake mix (from jar). Add butter, shortening, buttermilk and vanilla. Beat with an electric mixer on low until combined. Beat 2 minutes on high speed. Add eggs and beat two minutes more. Pour batter into prepared pans. Bake for 30-35 minutes or until inserted toothpick comes out clean. Cool on wire racks. Frost with cream cheese frosting if desired.
Monday, October 23, 2006
REMINDER TO SELF
Picture People Appointment
1:20 pm
Arrowhead Mall
*check*
I went and got pictures of the kids done today for Christmas cards. They turned out really cute! I am quite excited. I was really worried because the kids were nuts and so hard to get to sit still for a second. I felt like I was chasing one and then chasing the other and then the first one again, and then the second -- over and over again. Anyway, I will post the pictures in a minute or two or twenty . . . the kids need me, they are *fighting* so I will be back later.
Thursday, October 19, 2006
Playing With Paper
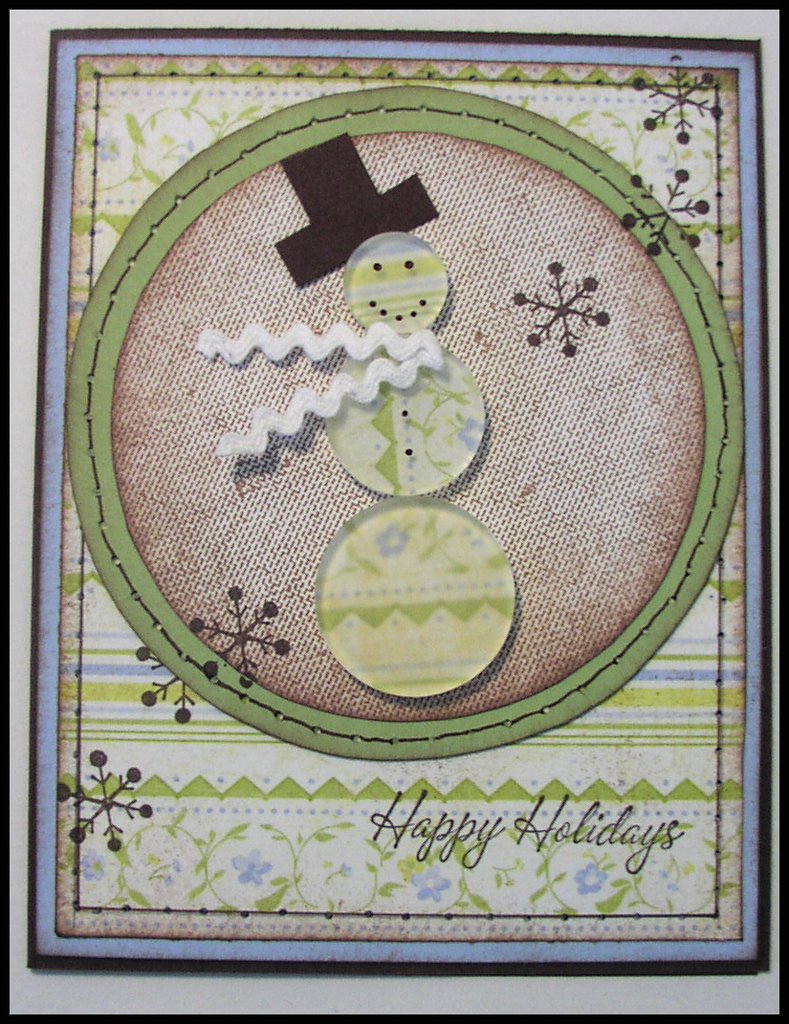 Okay, so I realized that I don't do enough playing with paper. You laugh, but I mean, patterned paper and such. I stamp, but I never think to use patterned paper on my cards and since I am not a huge scrapbooker, my stack of cool papers I picked up and have not used is getting larger and larger. SO, I decided to try and use some. It was tough because the paper I chose was Basic Grey Lily Kate, but I think in the end it was worth it because I love the card I made. I don't know if I can send it to someone for Christmas. The card idea came from one I saw in November Papercrafts, by Linda Beeson. My turned out different, quite different, but some ideas were started there.
I also used this opportunity to use some of the Tim Holtz Frostz Mosaicz that I got in a kit when I helped out for the Creating Keepsakes Convention in Phoenix. I love the look of them, and have been hesitant to use them, but I just took the plunge. Tell me what you think???
The circle is stamped with SU "Linen" background. The snowflake is from SU "Cold Play" and the sentiment is from SU "Warmest Regards" which is a hostess set, so if you are not a demonstrator, quick, book a workshop so you can get it. It is awesome. Oh, and the little bit of white rick rack as a scarf was an afterthough, and I think it works. It just needed something more. The hat was just cut out freehand out of chocolate chip cardstock and the face and buttons were drawn on with a brown sharpie (thanks Jody). Finally, all the faux stitching was done with an SU marker, chocolate chip.
Working on stuff for Super Saturday.
Well, it is almost finally here. I am rushing around like a mad woman trying to get everything done. I just want the girls to think my stuff is pretty cool so that they will be interested in stamping and come to classes at my house. My kids have been behaving so well today.
Here are the things that you will get to see soon:
Holiday Spice cake jar and tag - 10/24
card box and christmas cards
glass etched votive holders
a yummy recipe page
christmas 2,4,6,8 box
christmas balls (super easy and fun)
glass etched decoration
christmas mini star book scrapbook
Phew, so that should be all next week-ish . . . thanks for checking in on me. I appreciate your comments and subscriptions (I think we are at 55 now- ever pressing onward to 100). See ya a little later with a new upload.
Wednesday, October 18, 2006
Fall Has Arrived
So I finally gave in and went to the new beta blogger. I had been using the classic template like a little chicken, but I decided to take the plunge. Bear with me while I work on updating my links and getting everything set up like it used to be again. I wish they made it a little bit smoother transition, but I will survive. In the mean time, enjoy the temporary color change *smiles*
I got the Doodle bug again
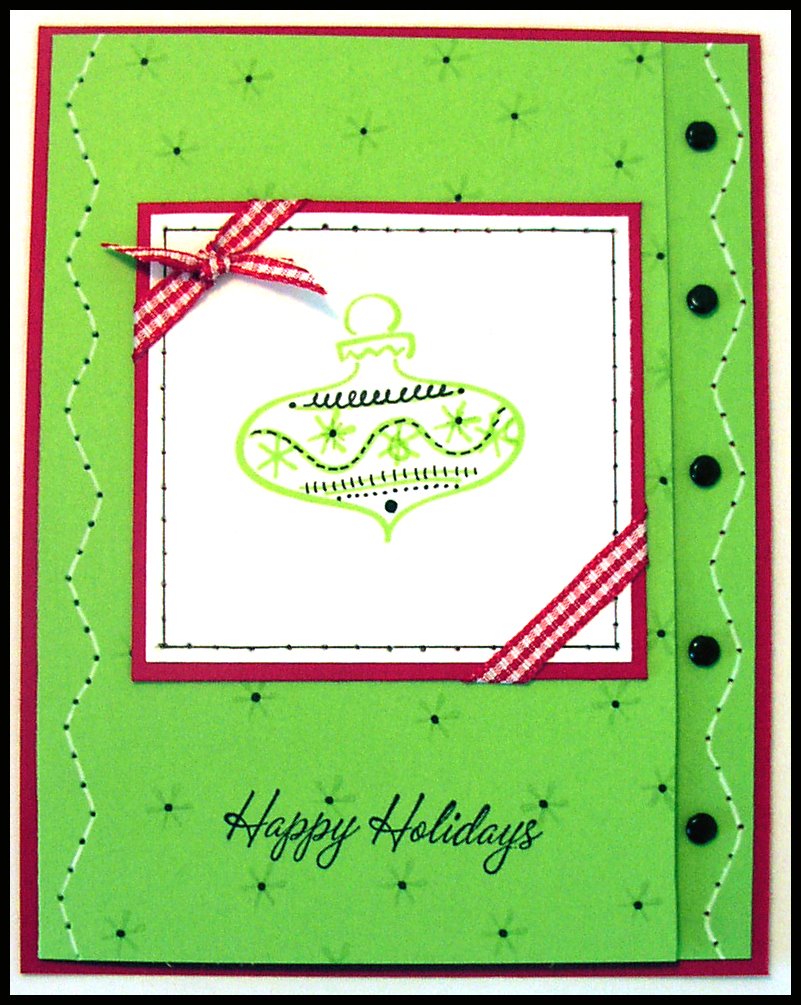 WARNING: Sunglasses may be required when viewing my latest creation.
 Is Wednesday hard for anyone else? HUMP DAY - I swear it is the toughest day for me. I always feel overwhelmed by what I have not accomplished and what needs to get finished to survive the weekend, and often will just disregard all of it and just veg in front of the computer and stamp.
This is a stamp from JoAnn's $1 section. A dear friend of mine, Jen, told me it looked like a face, so this is my attempt to make it look less like a face by adding some doodles. It was fun to try. . . the background is stamped with the little star from retired Shapes and Shadows. Then I dotted in the middle of each one. The wavy stitching was done on my sewing machine -- very cool. I added the gingham and the brads both for interest. All in all I think it is a funky little card, and I am totally in the swing of designing Christmas cards for the year -- two days in a row! WOOHOO!!!!
Tuesday, October 17, 2006
'Tis the Season for Stampendous Joy
It is not quite after midnight yet . . . okay, it is only 10 pm, but I am tired and want to get this published on here as soon as I can . . . so this post counts as Tuesday's entry okay *wink* I am gonna fudge on the time a little bit. Just this once . . .
Okay, so I am finally giving in and starting to work on Holiday cards. It is mid October now, so that is totally legal right??? Basically, I was inkspired to start working on them because on Saturday on my mommy time, I found the most perfect stamp that I think I want to use on my Christmas cards this year. I wanted them to have a more religious theme to them, but I was struggling to find a stamp that would work, and I found this one from Stampendous.
Okay, so I am finally giving in and starting to work on Holiday cards. It is mid October now, so that is totally legal right??? Basically, I was inkspired to start working on them because on Saturday on my mommy time, I found the most perfect stamp that I think I want to use on my Christmas cards this year. I wanted them to have a more religious theme to them, but I was struggling to find a stamp that would work, and I found this one from Stampendous.

The technique lovers challenge--TLC86-- was to use non-traditional colors on your seasonal card. So, I decided to make a Christmas card, not using red and green, or even blue for snow, but using brown, only brown. I am totally pleased with the results of this card! I love it. The layout was totally CASE'd from my favorites gallery -- where this one was located by Julia S. Thanks for the inkspiration girl. Mine turned out totally different than hers did, but you can see the resemblance still.
The main image is watercolored using a blender pen and the lid of the close to cocoa ink pad. I only used that one ink pad to watercolor, but as you can see there was great ability to shade with it. I used my glaze pen on the star to make it pop (you cannot really see that in the picture, but in real life it looks snazzy). The faux stitching was done using a chocolate chip marker and piercer. The SU "Linen" stamp was used to stamp the background in creamy caramel. Then I tied the ribbons (creamy caramel gingham, chocolate grosgrain, cream grosgrain) and stuck it all together. The "joy" sentiment is from SU "Small Script" which I think they retired, but I could not resist because I thought it would be perfect for this card. All in all, it came together rather nicely. I am excited to play with this stamp some more.
The main image is watercolored using a blender pen and the lid of the close to cocoa ink pad. I only used that one ink pad to watercolor, but as you can see there was great ability to shade with it. I used my glaze pen on the star to make it pop (you cannot really see that in the picture, but in real life it looks snazzy). The faux stitching was done using a chocolate chip marker and piercer. The SU "Linen" stamp was used to stamp the background in creamy caramel. Then I tied the ribbons (creamy caramel gingham, chocolate grosgrain, cream grosgrain) and stuck it all together. The "joy" sentiment is from SU "Small Script" which I think they retired, but I could not resist because I thought it would be perfect for this card. All in all, it came together rather nicely. I am excited to play with this stamp some more.
Monday, October 16, 2006
Boss' Day
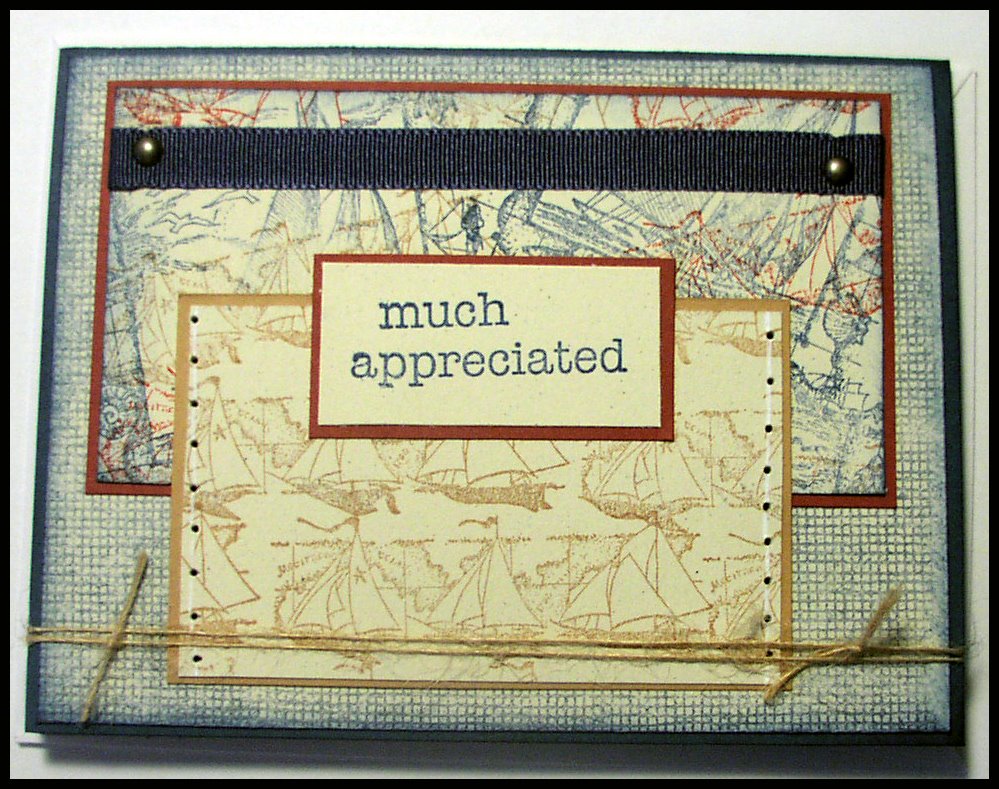 I don't have a boss, I am the boss, *smiles* well, at least of my household during the day! But, M does have a boss, and so I made it a quest to create a masculine card for him to give his boss. It was not an easy task for me, but here is what I came up with. I really hope his boss likes it.
I used SU's "Set Sail" because I don't have any masculine sets that are current. Good info for me though for Fathers Day -- clearly I will need one. The colors are creamy caramel, ruby red, and not quite navy. The neutral paper is confetti cream. The ribbon is American Crafts Elements ribbon. The bottom has some linen thread double tied. The sentiment is from SU "Much Appreciated." Oh, and I paper pierced the edge of the caramel layer for interest. I think it turned out pretty good for a masculine card. Happy Boss' Day. Don't forget to thank your boss for a job well done.
Oh, and in other news, Mr Brown (aka UPS) will be coming today to drop off a bunch of paper, some stamps and oval punches. YAY! I am pretty excited because I need to cut and prepare for Super Saturday which is only a few days away . . . YIPES!
Saturday, October 14, 2006
I got GOOD MAIL!
So, splitcoaststampers is down right now. A real bummer cause I was in the mood to sit online and chat with my goofy chatter friends tonight. Also a bummer because I just commented on a bunch of cards and they all still claim to be "loading" but have been doing that for an hour. I am trying to stay up because Stampin' Up! will have their new mini catalog online for demonstrators tonight at midnight. I really really want to see what is in it. I should be getting an order Monday (but it is mostly paper - YUCK), but if the catalog is really good, I might have to place another order sooner, rather than later (YAY!)
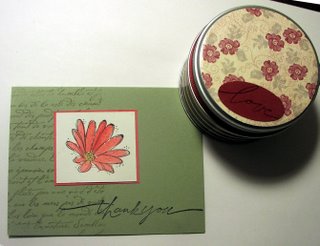 Today was a pretty good day all in all. It started off with me getting my "Slumber Parties" order from a fellow SCS'er. It was so generous of her. She included a great card, and a tin that was decorated with designer papers. Inside the tin was a hodgepodge of metal -- brads, hodgepodge, buttons, eyelets, basically all sorts of coolness. She also sent a couple of gag gifts, which were too funny! She is a riot! I cannot believe how sweet she was to send the extras in my package.
After I got the mail, I went out for my mommy time. I went to Lowes because I needed to return my fan (the one we got was missing pieces) and get a replacement. I also got a curtain rod for J's curtains (hooray, he will finally have a topper over his blinds), and a yummy hot chocolate candle, and a plant pot and soil to replant my aloe vera (because it is in this tiny pot and is really struggling.) After that, I went to The Creative Quest and bought two stamps and a glitter pen (which I needed for Super Saturday next Saturday). Then I quickly drove back from Glendale to Avondale, and met DH and the kids at Claim Jumper for a late afternoon lunch. It was great. Lots of fun! My kids are so funny, but we lived somehow. When we got home the kids were super tired, so they went to bed early and now at 9 pm, still have not woken up, so I think I am going to let them just sleep the night through, if they will. I think they need extra sleep.
Which brings us to now . . . what to do, what to do . . . I worked on a card box (box to contain cards as a gift) and N O E L letters for my wall, but they are not quite done (soon, I promise I will show you them soon.) I think I am going to go through my sample drawers soon and pick out samples (christmas ones) for Super Saturday and maybe first stamp a little gift bag . . . anyway, it is only 9 pm, so I might be back if I am bored again! See ya!
P.S. We're at 52 subscribers -- when we get to 100 there is gonna be some partying!!!
Friday, October 13, 2006
Are you SUPERSTITIOUS?
Friday the 13th is here again for all you paraskevidekatriaphobiacs among us. Don't worry, it is going to be okay . . . because it is FRIDAY for one thing, and because I intend to stamp today. So, take a deep breath, relax and stamp with me.
But first, here is a brief history of Friday the 13th, and why it is scary to some.
But first, here is a brief history of Friday the 13th, and why it is scary to some.
Thursday, October 12, 2006
Winners got their prizes. . .
 Congrats to my winners. I just want to post what I sent to them, so you could be jealous (*or not*). Karen was super generous and sent me the pictures, because in my haste to get
 them into the mail, I totally spaced it on taking a picture - DUH!!!
Inside was some primas, some chipboard, nail polish, gum, chocolates in a tin, tissue, and ribbon. I think that was it. That is all I can remember. Anyway, hope that the girls liked it. I will send prizes again when we get to subscriber #100 -- but we have a bit of time to wait before then . . . or you can shock me into action . . . whatever you all like *grins*
Wednesday, October 11, 2006
Color over Alcohol Inks
 I have been playing with stamping color over the alcohol ink backgrounds, instead of just a solid black. I was inkspired by my ink pads. I looked over and creamy caramel and blush blossom just happened to be right beside each other on my ink rack, and I thought that they might look pretty nice together -- so I tried it. I actually really like the combination. This card was Only orange refill and terra cotta adirondack alcohol ink using the blending solution. Then I stamped the leaves from SU "Autumn Leaf Prints" in creamy caramel. I layered that on creamy caramel, and layered the whole thing on blush blossom cardstock. The "Just a Note" stamp is by Wordworth. I fell in love with it the last time I was at my local stamp store. I love how this turned out. Soft, but also very autumn.
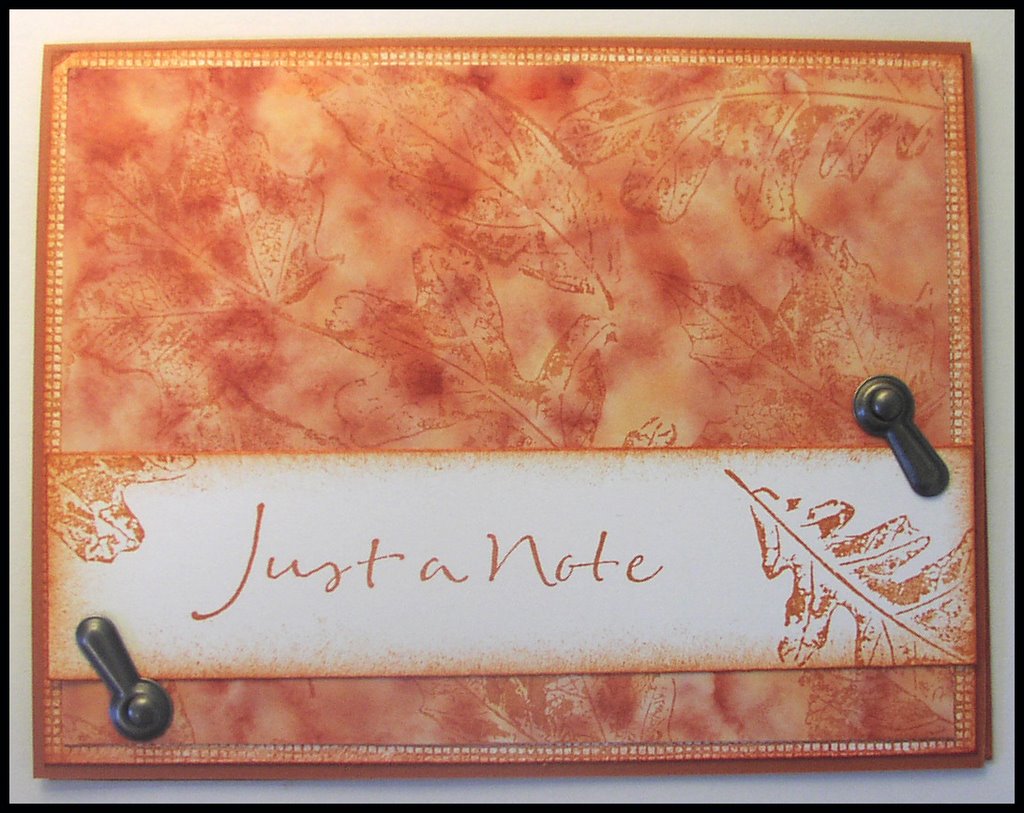
The second card was made using the same colors of alcohol inks, but less blending solution -- which made it much deeper and richer. I stamped the leaves from SU "Autumn Leaf Prints" in really rust ink. I layered this on a background, stamped with canvas background stamp, and sponged on the edged. These were both layered on really rust cardstock. I wanted to distress more on this card, but I cannot for the life of me find my Heidi Swapp paper edge distresser -- so I might just have to pick one of those up again *sigh*
So, are you sick of alcohol inks yet? I am so addicted, but I will try something new and different and exciting for you tomorrow . . .
Tuesday, October 10, 2006
CALLING ALL YOU TECH SAAVY PEOPLE
I totally want to put a banner across the top that is cooler looking but I have no idea how . . . so if you have the 411, please zip me an email or post a comment with any links to help that you think might get me to that point. I tried looking, but I just cannot make it work!!!
Hugs and thanks in advance!
Hugs and thanks in advance!
Yummy Crescent Rolls
So yesterday was Canadian thanksgiving and since I am a Canadian, even though I live in the USA, I decided to celebrate. I made a turkey dinner, complete with mashed potatoes, green beans, cranberry sauce, gravy, stuffing, but most importantly, I made the most delish Sweet Potato Crescent rolls. I got the recipe from Taste of Home Best Holiday Recipes magazine. It was $10.99 and so worth it. Anyway, they are delish! They taste nothing like sweet potatoes and are not really yeast tasting -- which I was concerned about. My kids gobble them up. They are light and fluffy and just AMAZING! So, being the generous person I am, and because I am so thankful for all of you who read my blog (*tear*) I decided I would share it with you, so you can use it for your Thanksgiving, or even Christmas.
SWEET POTATO CRESCENTS
Rebecca Bailey, Fairbury, Nebraska
2 packages (1/4 oz. each) active dry yeast
1 cup warm water (110 to 115 degrees F)
1 can (15 oz.) cut sweet potatoes, drained and mashed
1/2 cup sugar
1/2 cup shortening
1 egg
1 1/2 tsp salt
5 to 5 1/2 cups all purpose flour
1/4 cup butter melted
In a large mixing bowl, dissolve yeast in water; let stand for 5 minutes. Beat in sweet potatoes, sugar, shortening, egg, salt and 3 cups flour. Add enough remaining flour to form a stiff dough. Turn onto a floured surface; knead until smooth and elastic, about 6-8 minutes. Place in a greased bowl, turning once to grease top. Cover and let rise in a warm place until doubled, about 1 hour.
Punch dough down; divide into thirds. Roll each section into a 12 inch circle; cut each into 12 wedges. Brush with butter. Roll up from the wide end and place, pointed end down, 2 inches apart on greased baking sheets. Cover and let rise unti doubled, about 40 minutes. Bake at 375 degrees F for 13-15 minutes until golden brown. Remove from pans to wire racks. Yield: 3 dozen.
Punch dough down; divide into thirds. Roll each section into a 12 inch circle; cut each into 12 wedges. Brush with butter. Roll up from the wide end and place, pointed end down, 2 inches apart on greased baking sheets. Cover and let rise unti doubled, about 40 minutes. Bake at 375 degrees F for 13-15 minutes until golden brown. Remove from pans to wire racks. Yield: 3 dozen.
CK Kits: The Return
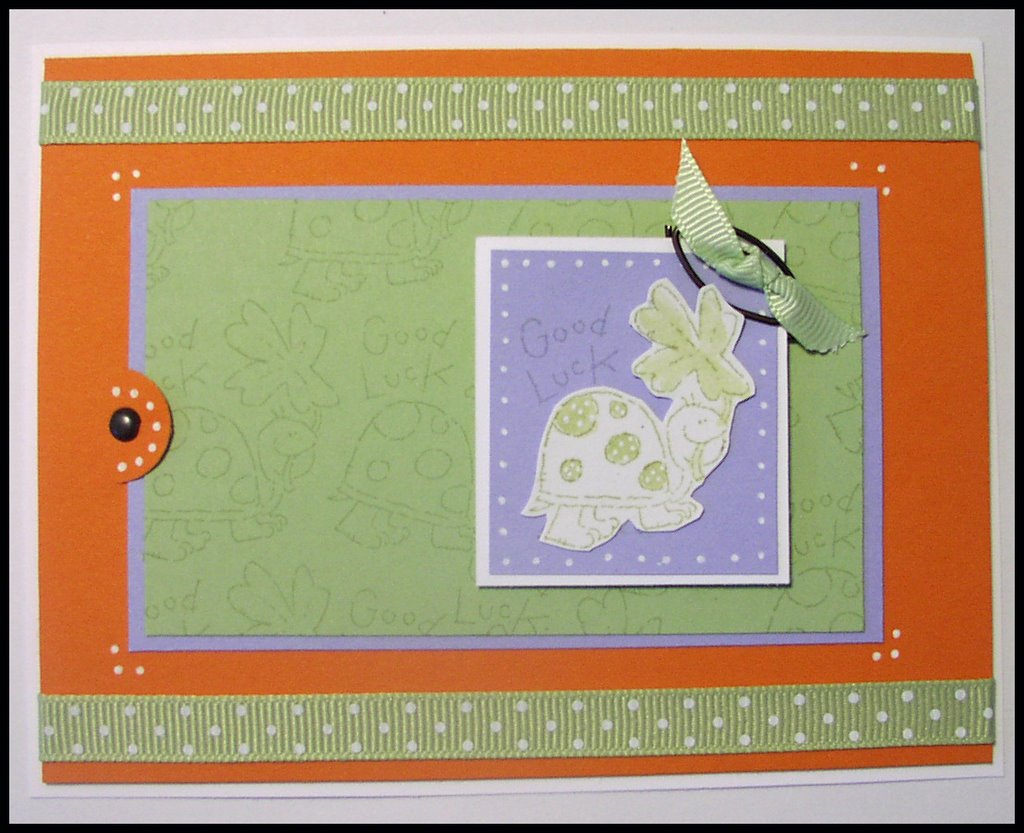

This kit was actually sponsored by Stampin' Up. Originally they used Mon Ami, but I did not have that set, so I decided to use SU "On the Move" to see what I could come up with. I think the results turned out okay . . . the colors they chose were totally not something I would use, but seemed to work. They were almost amythest, pumpkin pie and bashful blue. The class was a techniques class, some of which were not done when I made them.
Monday, October 09, 2006
Finally: CK Kits
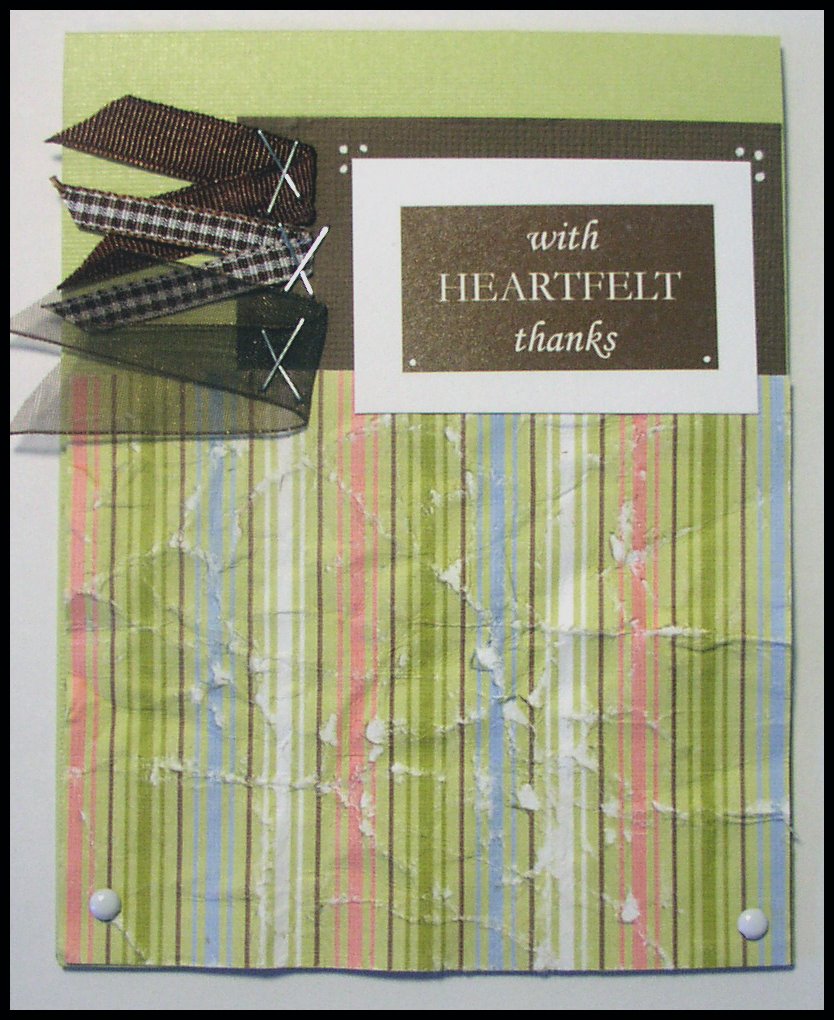
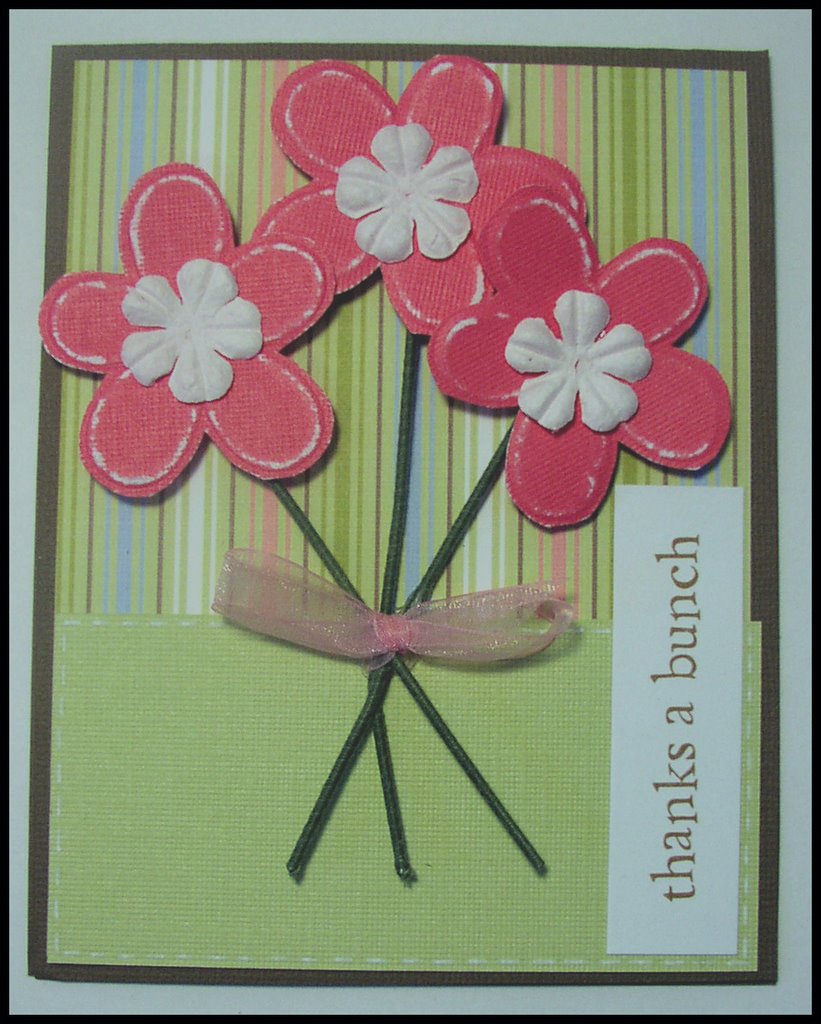
So last night after I finished watching Desperate Housewives (SPOILER ALERT: so soapy, but oh my gosh I cannot believe Andrew went home to Bree) and "The Lake House" (I was surprised at how good this one was -- DH had to over analyze it though, as usual *sigh*), I decided to work on the cards in the card kits that I got at the Creating Keepsakes convention. Since I was not in the class, but just volunteering, I did not make them while I was there, but the teachers were very generous and I got a kit for each one with insturctions. Naturally, I had to embellish, modify and make them mine. It was a lot of fun to play around. These three cards are from the class called "Card Work not House Work: Wash, Dry, and Embellish" by Wendy Johnson. It was fun. My favorite part was the glue charms with rub ons on top -- look really snazzy for just a glob of glue if you ask me. Look for me to do this on future cards. *smiles* I also like how these cards involve no stamping. It was good for me to work a little more with paper and no stamps.

Saturday, October 07, 2006
CC82 - Olive, Celery, Red
 I just whipped this one up really quick this morning. I have to go to the dentist now, but I will edit and post details when I return . . . just wanted something new and pretty for you all to look at *smiles*
This card uses SU "Print Pattern" to create an argyle background. I also used my black gelly roll to make faux stitching. The background is stamped with a cute decoration stamp I got at JoAnn's in their $1 stamp area. The old olive was an idea I saw in the SU Idea Book and Catalog. First you fold the paper on itself and then pierce and stitch it. The sentiment, "Seasons Greetings" also came from JoAnn. I love it! I think it is such a pretty sentiment.
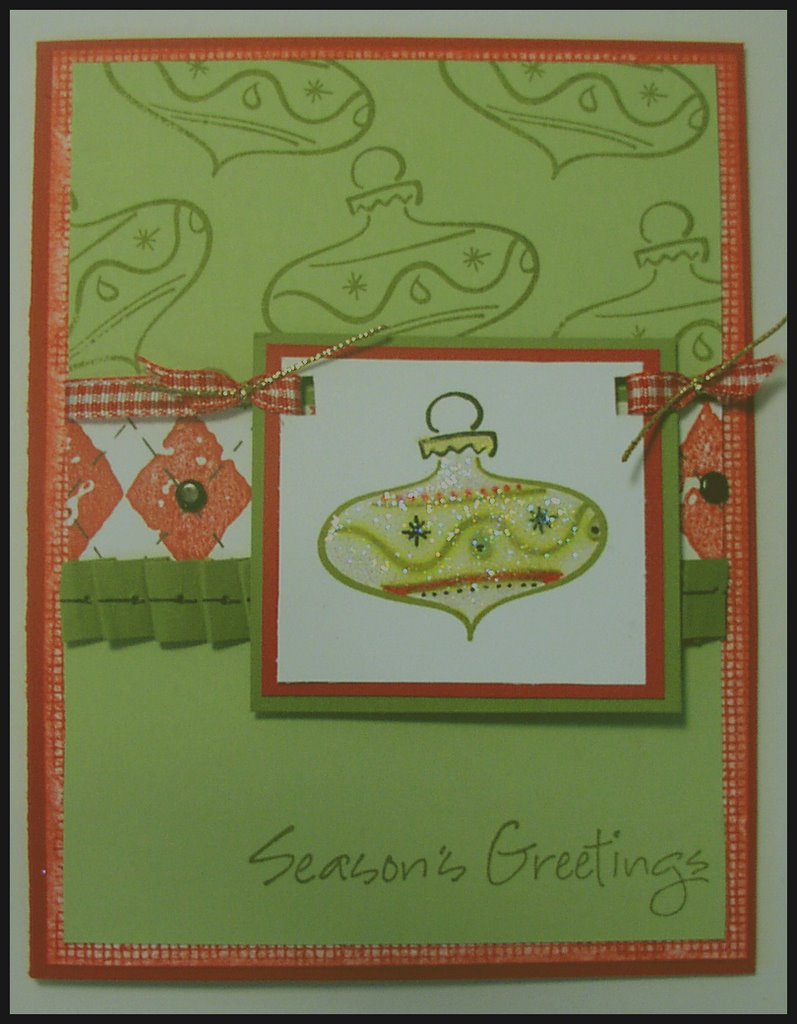
When I got back, I decided that this just wasn't enough . . . I wanted more from this card, so I pushed it . . . I like some things about the final one, but others I just wish I left alone . . . but, that is how it goes. The decoration ended up bleeding (the old olive part) and did not look as pretty. I used crystal effects and glitter on top, which helped, but still not as pretty as the original. Thanks for viewing my struggles as a stamper. I feel like this is the place to share both my success and my failure.
Friday, October 06, 2006
TLC 84 - Black and White
 Okay, so I slacked on my blog, but in my defence, I did do some good retail therapy at Recollections yesterday. My kids and I have caught a cold and sore throat, so we have been totally relaxing.
But, today is Friday, and it is my goal to complete all of the weeks challenges today. We shall see how it goes. I am in a stamping mood.
The first card I created today uses only black and white. It was the technique lovers challenge (TLC) on splitcoaststampers from Monday. The background was created by using the alcohol inks blending solution with black staz on ink refill. I chose the staz on, because the classic black SU one tends to have a more purple color when diluted at all. I wanted it to stay true black and white. I stuck that background on a layer of white, using black brads (in the corners, hard to see) and then stuck the white layer on the black cardfront. The tag uses all sorts of fun toys. First I used my Lasting Impressions frame template to dry emboss the black paper. Then I used my white gelly roll pen (because a card would not be an Amanda card without it) to outline the dry embossing to make it pop more. Then I layered the tag on a white paper tag. I used Doodlebug design inc. Sew Easy Expressions rub on stitches around the edge. I have just been waiting for the perfect chance to use those. Finally, I embossed the spider in black, but him out and layered him on top of the tag. Then I added the google eyes with Ranger Inkssentials Glossy Accents (similar to SU's Crystal Effects -- I was all out and needed some, so I picked this up). Then comes the only part of the card that is not exclusively black and white. I stapled the ribbon (with silver staples - *shock*) and then adhered the tag to the card. My final touch was to write "Boo" at the bottom using my gelly roll pen. Too cool cause I actually don't hate my handwriting so much on this card!!!
Tuesday, October 03, 2006
Just to let you know....
 I will be MIA most of tomorrow (maybe will post something late tomorrow night) -- I have to do laundry (yep that is right, not only do I have the big rubbermaid bin full of clean laundry to fold, but also my entire bed is covered with a laundry mountain), iron and clean off my disaster of a stamp
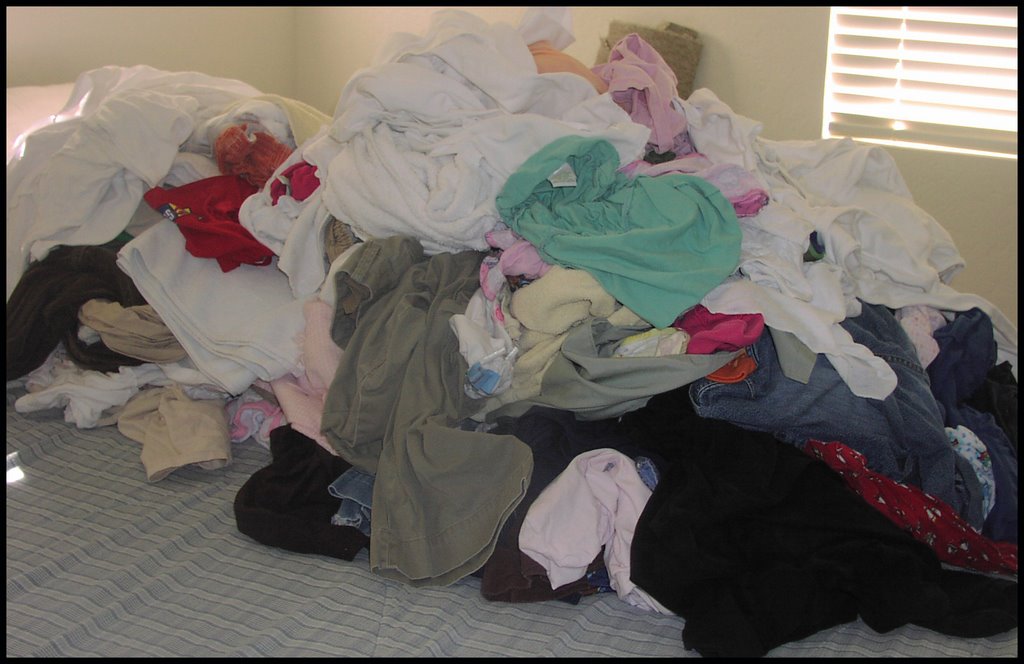 desk, (if I want to stamp ever again that is). Hopefully my kids will cooperate. J has been sick with a cold since we came home from Utah, so hopefully he will not be too needy because I need to get this all done. I mean, seriously, clean laundry and a grumpy hubby do not inkspire me. Miss you all . . . .
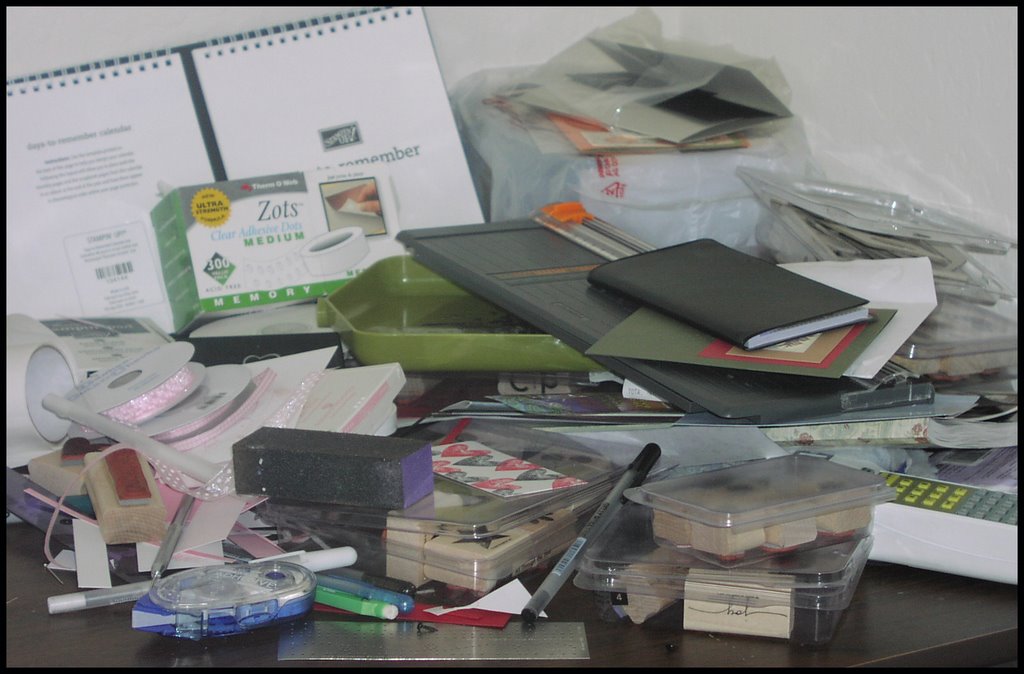
UPDATE: I finished folding all the laundry while I watched X-Men and X2 waiting for DH to come home from work. My desk is still in the exact same predicament, but, I plan to stamp tomorrow, so I will have to clean it up then . . . The laundry went rather quickly because I was distracted by the movie. I also got chinese takeout last night, so that helped with not having to cook and all. *smiles*
A Mess, my stamps are a mess....
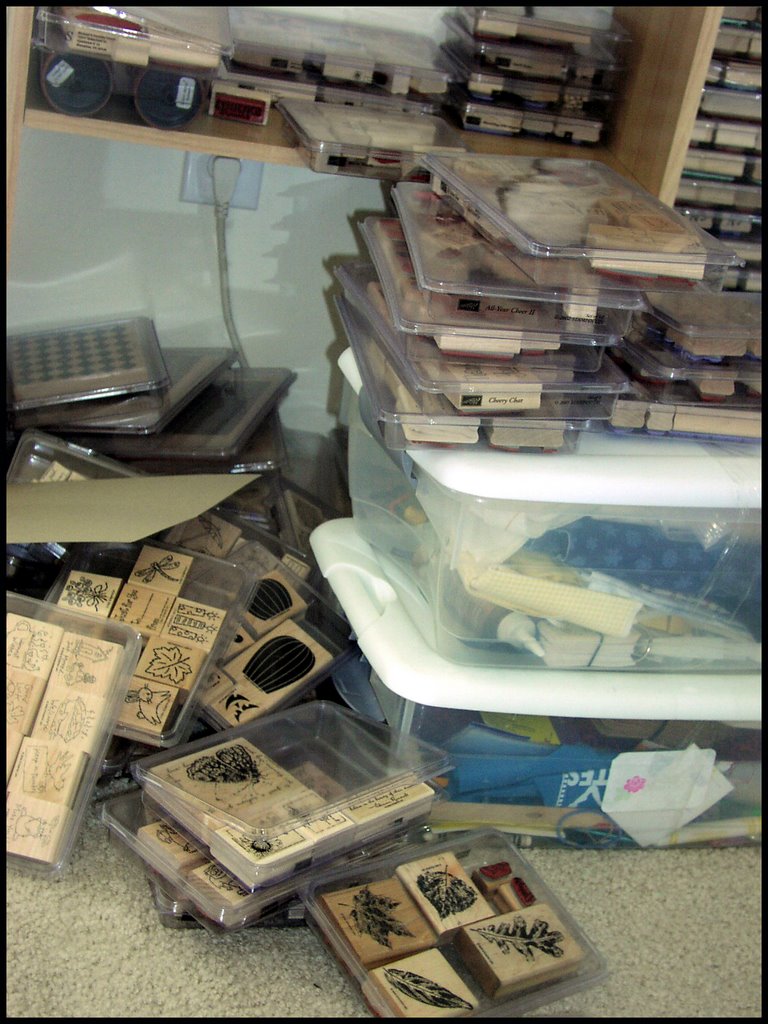 Am I the only one who is random in their selection of what stamp set to use? I have this nice shelf to store my stamps on, but somehow they always end up in a big pile on the floor. SERIOUSLY!! (a little Grey's Anatomy reference for all you GA fans)
 Today, SU "Bugs and Kisses" just happened to be the one on top, calling my name, so it got a little more use. I have been playing with my alcohol inks and made this blue and green background, and when I grabbed this set, I instantly could imagine the bugs embossed in black on this background. SO, I did it. I think it turned out cute. It's a very simple layout, but it works. The background was created by placing a round magnet on the paper and then dotting around it using the gel pen. Really simplistic, but I think it worked out well.
 The sentiment is framed using chipboard hardware by Basic Grey. I painted it black using the coolest paint -- it is glossy paint. I got it at Walmart for 77 cents. It works perfectly for things like this -- also really good for painting metal -- such as those tins that everyone was doing not so long ago. After the paint dried, I used my white gelly roll pen to create stitching. I wanted to sort of mimic the ribbon. The ribbons are both from Michael's. The green and turquoise one I got for $1 and was just waiting for the perfect opportunity to put it to good use. Oh, and I colored the eyes of the grasshoppers white and the dots on the lady bugs blue (both gelly roll pens), just cause I thought it would be fun!
Anyway, must go now . . . M wants me to pick up X-Men 3 and the kids want The Little Mermaid -- so after calling around to the stores in town, I think I have found some of the best prices . . . have a good Tuesday! Oooh, and I am sending out packages to my two winners today -- sorry it took me so long to send them -- hope you like them *smiles*
Monday, October 02, 2006
Glazing it Up!
 So on Friday, during all my running around, I just managed to swing by an art supply store that had the Sakura Gelly Roll Glaze Pens that I have wanted since El Paso. They are the neatest thing. They are clear ink, and you put it over a stamped image to create an embossed look. SO NEAT! M said it must be a scam -- clear ink??? Such a skeptic. I just could not explain it to him. Anyway, I bought two packs (just in case) and I now am the proud owner of 4 of these fantabulous little pens.
 The effect they have is very subtle. It is like faux embossing with a pen. I really like the freedom this gives you (much more so than regular clear embossing powder.) I used the pens to make this baby card. The bunny is faux embossed using the pens on the outline. I also did the pads and insides of the ears in pink and then glaze pen. I also used both a white gelly roll and then the glaze gelly roll on top on the "Congratulations" across the bottom. I really like the effect. (Sorry it is so hard to see -- if you click on the picture and look at the bigger version you might be able to see a bit better). The bunny parts are popped up a little using glue dots. The background is done using SU "Pretty in Pink" reinker and the alcohol inks blending solution and applicator tool. I also stamped linen in the background directly behind the bunny and pink layer. I decided I needed to have some baby cards on hand because lots of people around me are due in the next few months.
Oh, and just for the record, I don't mind if you all comment. In fact, I am what my friend Jen calls a comment "ho." I need them, I want them, oh baby, oh baby! I read each and every one of them. They are the highlights of my boring mommy day. So, if you have a second -- tell me what you think. *smooches*
Subscribe to:
Posts (Atom)